Your Cockpit Mounting Design is Complete
The design of this Cockpit mounting is complete, which means you have:
Provided mugshot photos of your motorcycle
Completed the Measurements Markup
Reviewed and approved the Mounting Diagram
If you don’t recall completing these steps or would like to request a change, please contact us immediately.
We post workshop photos to your Cockpit project page and email you to notify you of the progress.
Once your Cockpit is built and shipped out to you, you will find photo mounting instructions posted to your Cockpit project page and included as a hardcopy with your Cockpit.
Mounting Instructions
Once we finish building your mounting hardware, we will post a workshop portrait and assembly instructions below. If you think you see an issue, contact us right away.
Installing the Baseplate to Your Cockpit
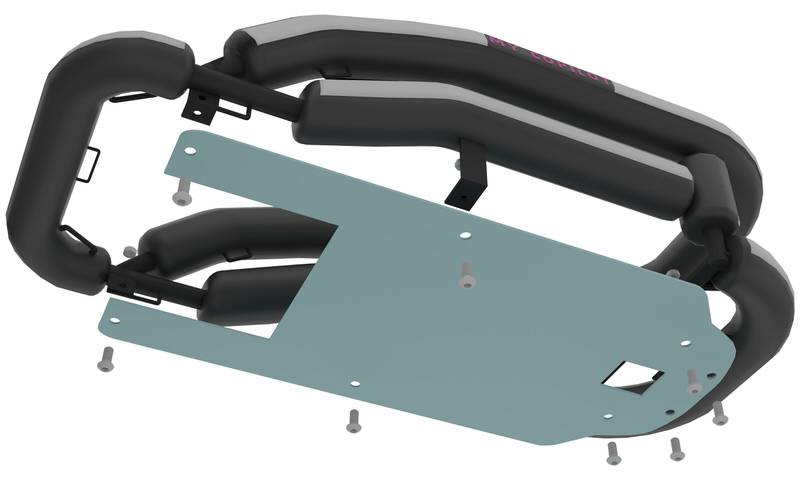
To install the baseplate to your Cockpit, line up the installation bolt holes (indicated in pink on the diagram). There are eight (8) bolt holes on all Cockpit sizes except the Nano.
Install the baseplate to your Cockpit as follows:
- Always mount the baseplate with the engraving facing upwards.
- Insert the shoulder washers into the baseplate to protect against vibration.
- Place the M6 Allen bolts from the bottom up so that the bolt head is facing down.
- The two longer bolts secure the baseplate to the crosswise bar – these are extra and optional.
- Place the washer and nut.
- Tighten the bolts little by little in a series of rounds to permit the metal hardware to adjust and settle.
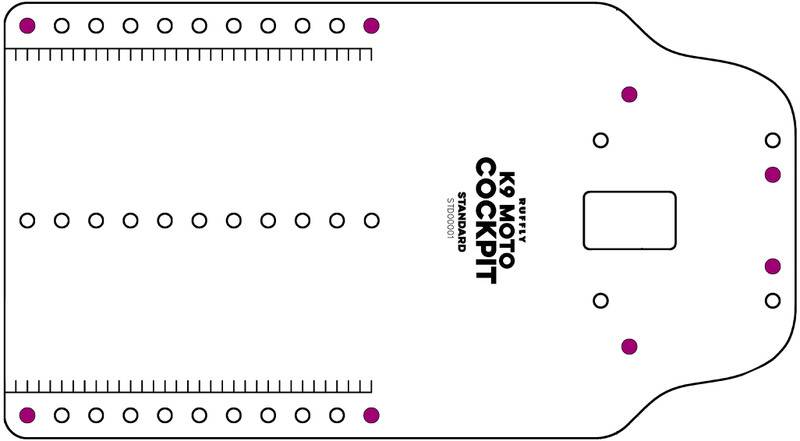
Your Cockpit Mounting Diagram
Your Mounting Diagram cannot be revised once you have approved it. The final, approved version is posted below for your reference along with the most recent Mounting Diagram Video.
Watch the Mounting Diagram Video
⁕ For simple instructions to turn on the autogenerated subtitles and have them auto-translated to your preferred language, click here.